| |
|
| Browse | Ask | Answer | Search | Join/Login |
|
|
||||
|
Hi Brian:
Good news on the joist! To install the roof boot just need to cut an oblong hole so pipe will stand up straight through the roof. Then you will slide the roof boot under the first layer of shingle and trim the shingle so it matches the contour of the metal/rubber interface... Once trimmed, the roof boot will slide into place and pipe goes up through hole in roof boot. Can add a little roof adhesive or even silicone under the roof boot if want... but not needed if sits down tight to roof and shingle matches contour of bulge in the roof boot! Let me know if that makes sense? MARK |
||||


|
||||
|
OK got the pictures
The last one goes out to the garage and up I think I used 6 couplings:):) what I was saying about the joists is... the white box looking thing there is the iron beam... and at the end of the joists is a 3 wide 2x8 beam... so in between here there can't be much weight on these joists,, not only that, above this is a closed off area, under the stove and emptyness :) so I figured this would be better to drill than the other ones, as every one of the other ones carried the full weight of the room above because they spaned between the two basement walls... :) |
||||
|
||||
|
Mark small problem,, it's the atack of the vent, AGAIN! Haha No but in the pictures you can see,, I can't get my connection to the vent lined up unless I move my san t down, but then I don't know if I can connect like what I'm thinking... I want to branch it out a little and then use a 90 and then use another 90 to the san t... but I'm not sure if I can do that,, |
||||
|
||||
|
Brian...
In this case I would get an 1 1/4" extension tailpiece, which will lower the ptrap which will allow you to lower the sanitary tee fitting which should allow you to work the fittings a little better so you can attch up to the vent.... I can't post a picture because my browser won't allow me to yet....:( The tailpiece should do the trick. Plan on getting the 6" long one or plan on cutting a 12" tailpiece to about 6"... Can use the 2 90s if you need too... Let me know if that made sense... MARK |
||||
|
||||
|
Makes perfect sense,, I forgot about the extension tubes... Ok another question,, should I fastening the toilet flange to the concrete floor underneath via some concrete screws? Or is it OK because its on concrete and tile? Just cement it into place (pvc cement)?? Thanks, should be done with this bath today ;) |
||||
|
||||
|
Cool that you will finish today!
I always screw my flanges to cement floor to reduce chances of toilet twisting and to reduce any chance of a call-back. I use the TAP-CON screws... just drill hole and screw right into the cement (just don't screw into pipe). If you choose not to screw the flange in be sure to add a bead of caulk to the toilet base... about 3/4 of the way around to help keep toilet from twisting. GOOD JOB DUDE! Post final pics. If you can! MARK |
||||
|
||||
|
Ok here they are :) thank you so much everyone, still have a couple of things to do but mostly done :) One thing do you recommend silicone or adhesive/culk for the shower walls, (I used silicone and it was leaking and pulled right off) but there was a small gap, Thanks again 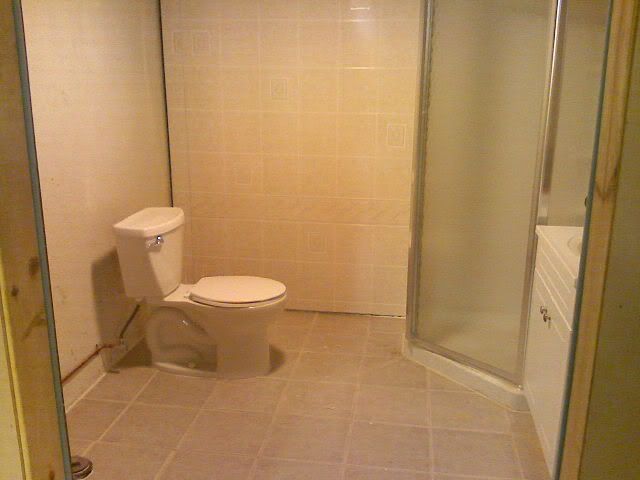 
|
||||

|
||||
|
Sure, it can be painted... I was watching your progress form distance. I think Mark did great job leading you though the project and various details - and you excelled in interpreting his instructions and making it happen. Overall, you should be proud of your accomplishment ! Looks good ! You saved yourself a bundle ! Congrat's ! |
||||
|
||||
|
Looks really good Brian...
I think this thread will serve to help others in the future... so check back once inawhile to see how many people have actually viewed this thread (already at like 1400ish)... ;) I'm not clear on silicone issue... I use a mildew-resistant caulking for shower in this case... everything must be absolutely dry before applying. Painting pipe: Sand the copper pipe down then apply a metal primer (rust-o-leum metal primer in can) and then paint using a rust-o-leum paint and should almost blend into wall... ;) Like Milo said... we can advise you, but you took the directions and made it work! GREAT JOB! And one last time I got to say it... NICE NOT TO STEP UP INTO THE BATHROOM... HUH? :p Talk later Brian... MARK |
||||
|
||||
|
Haha its wonderful, I wouldnt have done it with out your encouragement, Thank you much for EVERYTHING!! Can I get a round of applause for Mark, everybody. As for helping people yes I think so, I ask so many questions haha, but maybe they could trim it up? There isn't much but I know they have modified it already.:p |
||||
| Question Tools | Search this Question |


Add your answer here.
Check out some similar questions!
I have water coming into my basment through the walls. Mainly where the wall meets the floor. How can I take care of this problem.
Hi... Just bought a house and the basement is not level. What can be done to create a level floor ready for carpeting. How much with labour and material would it cost?
I have a old house with a stone foundation, what's the best way to seal a stone foundation, we are getting leaks from a couple areas. Thank you Rob
Hello I have a couple of questions, first off I am building a bathroom in my basement. It is a new house only 2 years old there are two stubs in the basement. One is the small one which I am guessing is the toilet the other a large square hole filled in with rock. I am guessing this is for the tub....
I'm trying to fix a problem in my house. There is only one thermostat and it is on the main floor but heat rises! So upstairs is really hot! In the basement it's really cold! What is the best way to fix this? I am renovating the basement so I would like to fix this before I cover the ducts up. I...
View more questions Search

|
